The Ultimate Apple Slab Pie Recipe
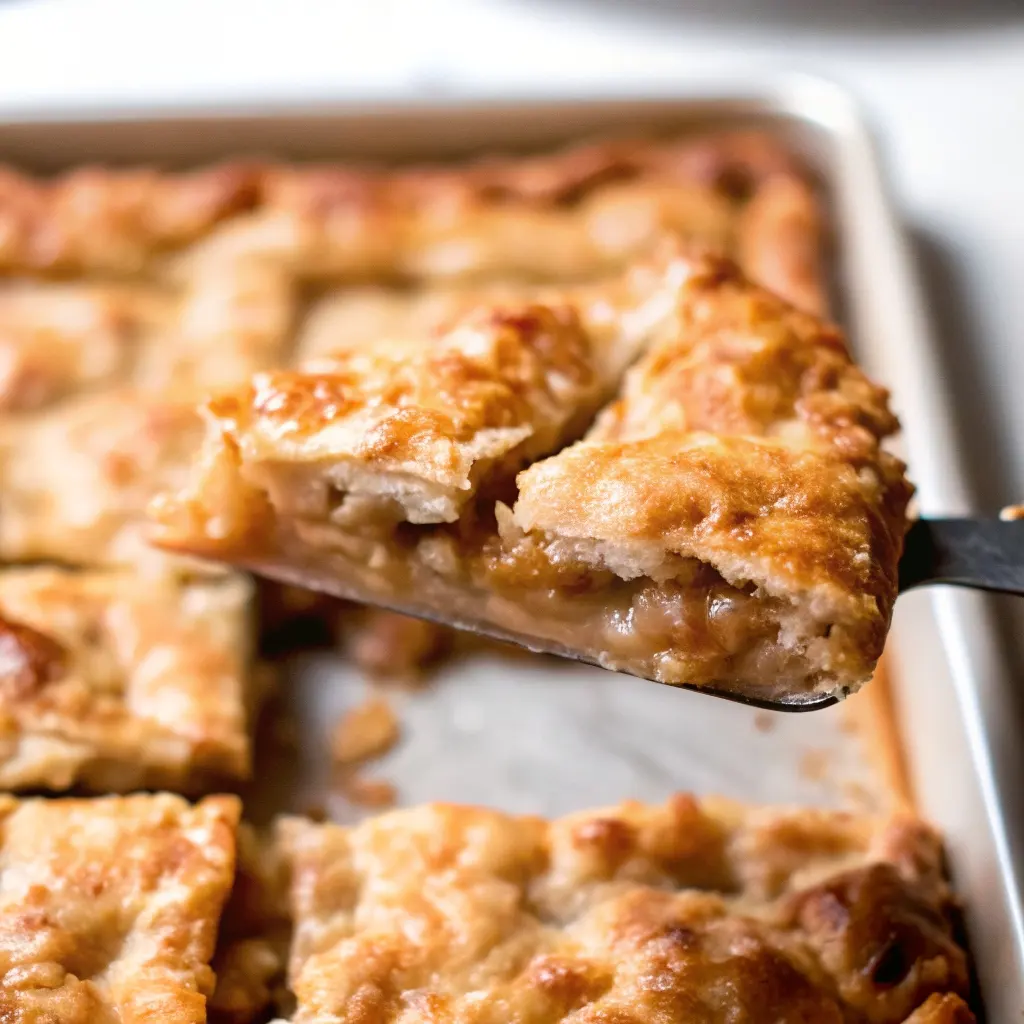
Apple Slab Pie is the only dessert recipe you’ll ever need for holidays, parties, or family gatherings. It’s easier than baking several round pies, feeds a large group, and guarantees a crisp, golden crust every time.
You get tender spiced apples, a buttery base, and options to make it just the way you like. Whether you want a crumb topping, puff pastry, or classic glaze, this recipe covers it all. With simple steps and zero soggy crusts, this pie is built to impress and built for real life. Let’s make your go-to apple dessert truly standout.

Table of Contents
Table of Contents
Apple Slab Pie Recipe
Ingredients
Method
- 1. Make the Dough: Place the flour, salt, and sugar into a food processor and pulse twice. Add the cold butter and shortening and pulse about ten times until the mixture resembles coarse crumbs. Sprinkle the cold vodka and water over the dough and pulse 4 to 6 more times until it starts clumping. Turn the dough onto a floured surface, form into a disk, wrap tightly, and chill for at least 45 minutes.
- 2. Prepare the Apple Filling: While the dough chills, melt the butter in a large sauté pan over medium-high heat. Add the apples, brown sugar, cinnamon, nutmeg, and salt. Cook, stirring often, until the apples have softened but still hold their shape, about 15 minutes. Transfer to a colander to drain and cool for at least 15 minutes.
- 3. Roll Out the Dough: Let the chilled dough sit at room temperature for 10-15 minutes. Preheat your oven to 425°F (220°C) and position a rack in the lower-middle. Roll the dough into a 20 by 12-inch rectangle and carefully transfer it to a 10×15 inch jelly roll pan, pressing it into the corners.
- 4. Fill and Seal the Pie: Stir the lemon juice into the cooled apples and spread the filling evenly over the dough. Fold the overhanging dough edges slightly over the filling. Brush the crust with the egg wash and sprinkle with demerara sugar. Cut 6 to 8 small slits in the top for steam to escape.
- 5. Bake and Cool: Bake for 25 to 30 minutes, or until the crust is a deep golden brown and the filling is bubbling across the surface. Transfer the pie to a wire rack and let it cool completely, for at least 90 minutes, before icing.
- 6. Add the Maple Icing: In a small bowl, whisk together the sifted confectioners’ sugar, maple syrup, and milk until smooth. Drizzle over the cooled pie. Let it set before slicing and serving.
Nutrition
Notes
- “Crust Dust” Trick: Sprinkle a mix of 1 tbsp flour and 1 tbsp sugar on the bottom crust before adding the filling to prevent sogginess.
- Lower Rack Baking: Baking on a lower oven rack ensures the bottom crust gets crisp and golden.
- Don’t Underbake: Make sure the filling is bubbling across the entire surface. This indicates the pie is fully cooked and the thickener has activated.
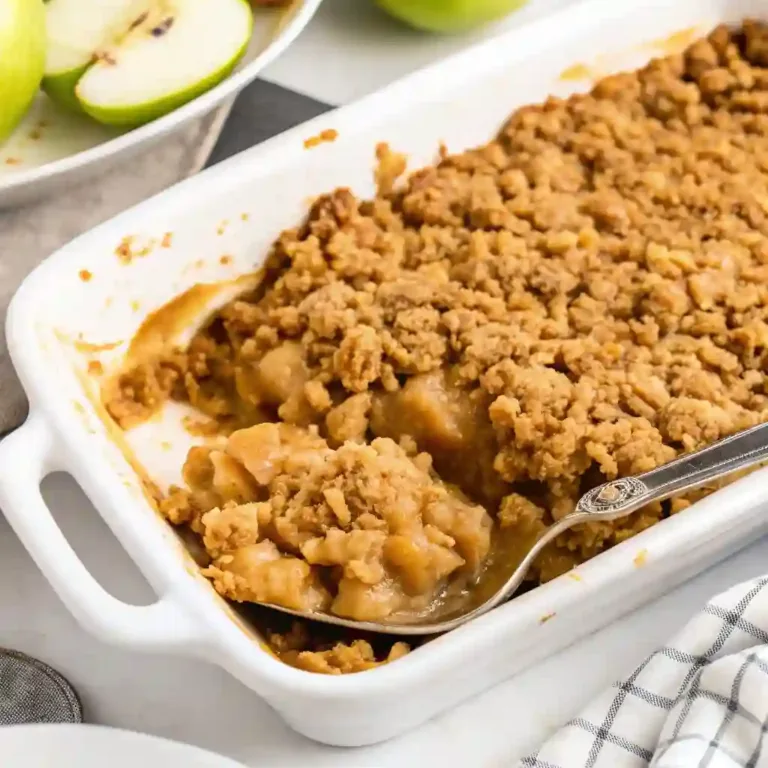
- Crumb Topping: Instead of the icing, top the unbaked pie with a mixture of ½ cup oats, ⅓ cup brown sugar, ⅓ cup flour, ½ tsp cinnamon, and 4 tbsp cold butter, crumbled together.
- Store-Bought Crust: For a shortcut, use 2 refrigerated pie crusts, rolled together to fit the pan.
- Store: Cover and store at room temperature for up to 2 days or in the refrigerator for up to 5 days.
- Freeze: Wrap the cooled, baked pie tightly and freeze for up to 2 months. Bake directly from frozen, adding extra time.
Tried this recipe?
Let us know how it was!Why This is the Best Slab Pie Recipe
- Feeds a Crowd: One 10×15 inch jelly roll pan easily serves between 15 and 20 people. It’s much more efficient than baking two or three round pies, making it the top choice for holidays or big gatherings.
- The Perfect Crust: Expect a buttery, flaky crust that stays crisp underneath the filling. This recipe includes smart techniques to avoid the dreaded soggy bottom and create a crust that holds its shape beautifully.
- The Perfect Filling: The apples cook down just enough to become tender without turning to mush. The flavor balances sweet and tart with hints of cinnamon and nutmeg for that warm, classic taste.
- Completely Customizable: From crust options to toppings, this guide lets you build the pie that suits your style. Whether you go for puff pastry, store-bought dough, a crumb finish, or a sugar glaze, it’s all covered.
- Make-Ahead Friendly: This recipe works great when prepped in advance. Whether you’re preparing the full pie a day before or storing the components separately, it’s ideal for busy baking schedules.
Ingredients and Key Equipment
For the Pie Crust:
- 2 ¾ cups all-purpose flour
- 1 tsp table salt
- 2 tbsp granulated sugar
- 12 tbsp (1 ½ sticks) unsalted butter, cold, cut into small cubes
- 6 tbsp vegetable shortening, cold, divided into chunks
- ¼ cup cold vodka
- ¼ cup cold water
For the Apple Filling:
- 2 tbsp unsalted butter
- 5 pounds fresh apples, peeled, cored, and sliced (a mix of Granny Smith and Honeycrisp works best)
- ½ cup packed light brown sugar
- 1 tsp ground cinnamon
- ¼ tsp ground nutmeg
- ¼ tsp salt
- 2 tsp fresh lemon juice
- 1 large egg, beaten with 1 tablespoon of milk (for egg wash)
- 1 tbsp demerara or turbinado sugar (for sprinkling)
For the Maple Icing:
- ½ cup confectioners’ sugar, sifted
- 2 tbsp pure maple syrup
- 1 tbsp whole milk
Key Equipment:
- Jelly roll pan, ideally 10×15 inches
- Rolling pin
- Food processor (or pastry blender/forks)
- Large sauté pan or Dutch oven
- Wire rack for cooling
How to Make Apple Slab Pie (Step-by-Step)

1. Make the Dough
Place the flour, salt, and sugar into a food processor and pulse twice to mix. Add the cold butter and shortening. Pulse about ten times until the mixture looks like coarse crumbs with some pea-sized butter pieces remaining.
Sprinkle the cold vodka and water evenly over the dough. Pulse four to six more times until it starts clumping together. The dough should hold its shape when pressed but not be overly sticky.
Turn the dough onto a lightly floured surface. Bring it together into a ball and flatten it into a disk. Wrap tightly in plastic wrap and chill for at least 45 minutes or up to two days.
2. Prepare the Apple Filling
While the dough chills, peel, core, and slice the apples into quarter-inch thick pieces. Melt the butter in a large sauté pan over medium-high heat. Add the apples, brown sugar, cinnamon, nutmeg, and salt.
Stir often and cook until the apples have softened but still hold their shape, about 15 minutes. Transfer the mixture to a colander placed over a bowl to let excess liquid drain. Let it cool for at least 15 minutes.
3. Roll Out the Dough
Take the dough out of the fridge and let it sit at room temperature for 10 to 15 minutes to soften slightly. Preheat your oven to 425°F (220°C) and move the rack to the lower-middle position.
Roll the dough on a floured surface into a rectangle about 20 by 12 inches. Carefully roll the dough onto your rolling pin and unroll it over a 10×15 inch jelly roll pan. Gently press the dough into the corners and up the sides.
4. Fill and Seal the Pie
Add the lemon juice to the drained apples and stir to combine. Spread the apples evenly over the crust in the pan. Fold the overhanging dough edges slightly inward over the filling.
Brush the crust with the egg and milk mixture, then sprinkle with demerara sugar for crunch and shine. Cut six to eight small slits in the top with a paring knife to allow steam to escape.
5. Bake and Cool
Bake for 25 to 30 minutes until the crust is a deep golden brown and the filling is bubbling. This bubbling is a sign that the pie is fully baked.
Transfer the pie to a wire rack and let it cool for at least 90 minutes before icing or slicing.
6. Add the Maple Icing
In a small bowl, whisk together the sifted confectioners’ sugar, maple syrup, and milk until smooth. Drizzle the icing over the cooled pie in thin ribbons. Let it set before serving.
“If you’re into warm, gooey desserts, don’t miss this Cottage Cheese Lava Cake surprisingly protein-rich and indulgent.”
Recipe Variations: Make It Your Own
Topping Variations
- Cinnamon Oat Crumb Topping: This topping adds a sweet crunch. Combine ½ cup of rolled oats, ⅓ cup of packed brown sugar, ⅓ cup of all-purpose flour, ½ teaspoon of ground cinnamon, and a pinch of salt. Cut in 4 tablespoons of cold unsalted butter until the mixture forms coarse crumbs. Sprinkle evenly over the apple filling before baking.
- Simple Vanilla Glaze: For a lighter finish, mix ½ cup of sifted powdered sugar with 1 tablespoon of milk and ¼ teaspoon of pure vanilla extract. Stir until smooth and drizzle over the cooled pie.
Crust Variations
- Store-Bought Pie Crust: For an easy shortcut, use two refrigerated pie crusts. Unroll them and slightly overlap on a floured surface. Gently press them together and roll out to a large rectangle. Use one crust for the bottom and the second for the top, or fold the edges over the filling for an open-faced version.
- Puff Pastry: Thawed puff pastry sheets offer a flaky, buttery alternative. Use two sheets, rolling them slightly to fit your pan. Line the pan with one sheet and use the second to cover the filling or cut into strips for a lattice top. Bake at the same temperature but check for browning around the 20-minute mark, as puff pastry browns faster.
Pro Tips for a Perfect, Never-Soggy Pie
- Use the “Crust Dust” Trick: Sprinkle a mix of 1 tablespoon flour and 1 tablespoon sugar onto the bottom crust before adding the filling. This thin layer absorbs extra moisture and acts as a barrier, keeping the crust crisp.
- Bake on a Lower Rack: Position your oven rack in the lower third. This brings the bottom crust closer to the heat source, encouraging a golden, fully baked base.
- Master the “Tenting” Technique: If the crust edges brown too quickly, loosely cover the pie with aluminum foil. Create a gentle foil “tent” that sits above the filling without touching it. This shields the crust while the center continues to bake.
“While you’re in the cozy baking spirit, try roasting these Pumpkin Seeds for a salty-sweet fall snack.”
- Don’t Underbake: Wait until the filling is bubbling across the entire surface, especially near the center. This means the thickener has activated and the crust is done.
Storing, Freezing, and Reheating
- Storing: If you plan to eat the pie within two days, cover it loosely and keep it at room temperature. For longer storage, refrigerate in an airtight container for up to five days. Reheat before serving for the best texture.
- Freezing: To freeze a baked pie, let it cool completely. Wrap tightly in plastic wrap, then a layer of aluminum foil. Freeze for up to two months. To freeze unbaked, assemble the pie in a metal pan, wrap well, and freeze. Bake directly from frozen, adding extra time until golden and bubbly.
- Reheating: For best results, warm slices in a preheated oven at 350°F (175°C) for 10-15 minutes to restore crispness. An air fryer also works well. Avoid microwaving, as it makes the crust soggy.
A Keeper for Your Kitchen
You now have everything you need to bake a show-stopping Apple Slab Pie. With these tested techniques and customizable options, you can confidently create a dessert that’s not just delicious, but perfectly tailored to your taste. Enjoy the praise!
If you tried this recipe, leave a comment and a star rating below. Your feedback helps others and supports our kitchen.
Don’t forget to share your pie photos on social media! We’d love to see how you made it yours. Did you go for the crumb topping or the maple glaze? Let us know what twist you added Follow us PINTEREST
Frequently Asked Questions
What is the difference between a slab pie and a regular pie?
A slab pie is baked in a rectangular pan to serve more people. It spreads the filling evenly, making it easier to cut and serve. Regular pies are typically round and smaller. Slab pies are great for holidays because they reduce prep time and increase servings.
Which apples are best for apple pie?
A mix of tart and sweet apples works best. Granny Smith holds its shape and adds a tart bite. Honeycrisp or Braeburn bring sweetness and firmness. Combining two or three varieties gives the best texture and flavor balance.
How do I make an apple pie without a soggy bottom?
Start by sprinkling a flour-sugar mix (“Crust Dust”) onto the bottom crust. Use a metal pan and bake on a lower oven rack to help the crust brown. Make sure the filling is cooked until bubbly so the juices thicken properly.
Should I cook apples before putting them in a pie?
Yes, partially cooking the apples helps control their moisture and prevents a watery filling. It also ensures they are evenly tender and allows the spices to blend. Sautéing the apple slices until just tender makes a big difference in both taste and texture

